
10/02/2007 09:46:00 AM Posted by Blogger Blogspot


I will create a website similar with vista website but of course with some changes. this is what you will make: 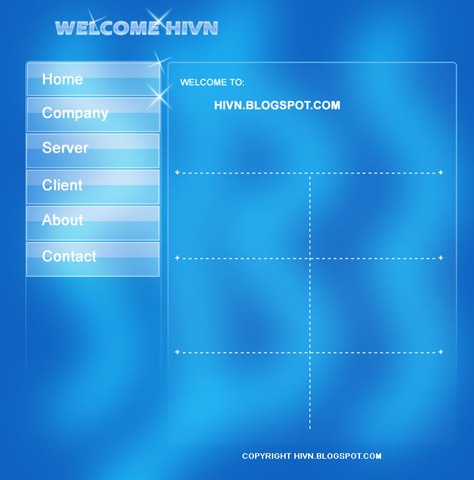
Create a new document with a blue background: #1063c1
The size should be 760 x 770 px.
Create a new Layer ( press SHIFT+CTR+ALT+N )
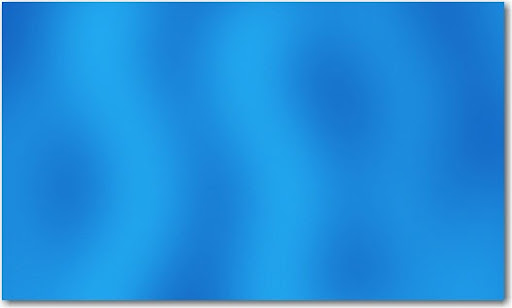
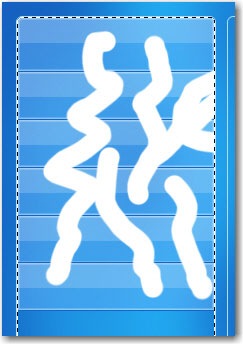
Then Grab Brush Tool and make some simple drawings ( the next image is resized )

Go to Filter > Blur > Gaussian Blur and use the following setting 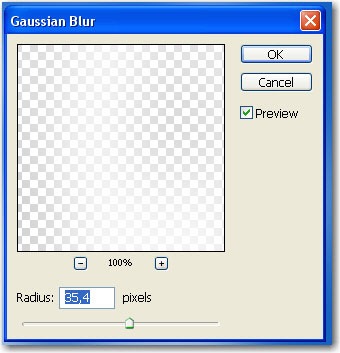
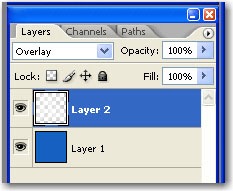
Now change the Blending mode for this layer to Overlay
You can see the result in the next image
Grab the Rounded Rectangle Tool
Set the radius to 5 pixels and make 2 shapes
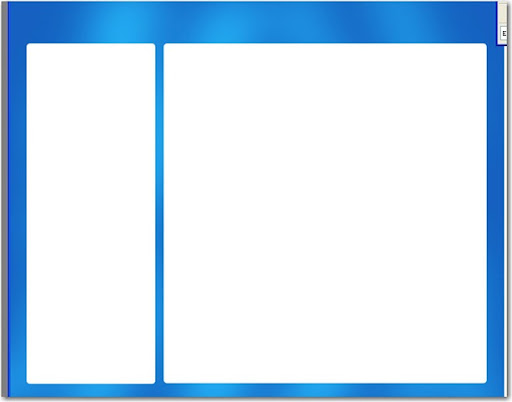
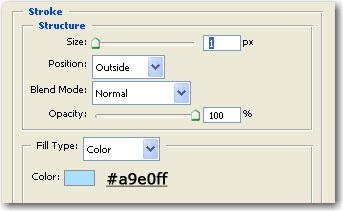
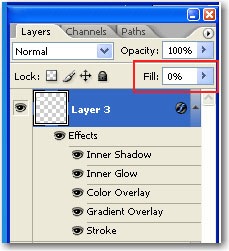
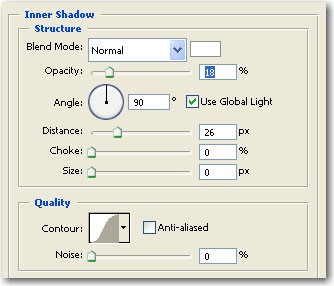
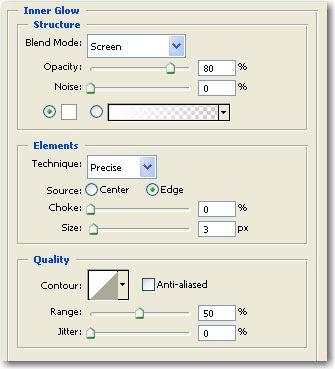
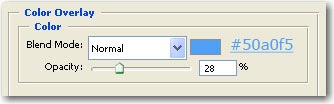
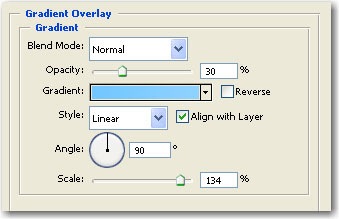
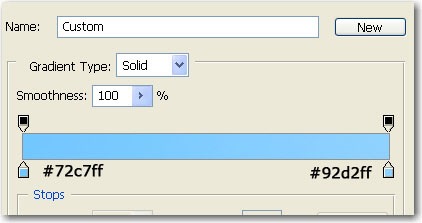
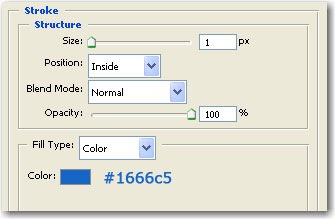
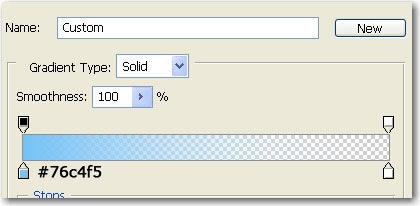
Now add the following layer style ( use the same settings for both shapes )
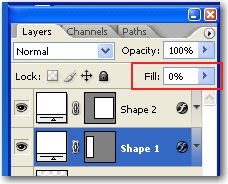
Then change the fill settings to 0 %
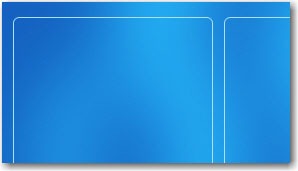
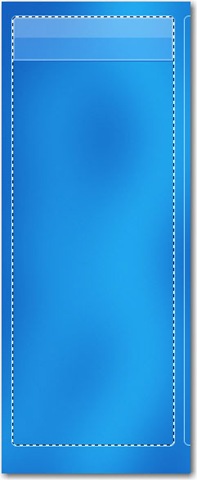
This is my result
Select the small shape and press on the layer thumbnail while you keep the CTRL key down
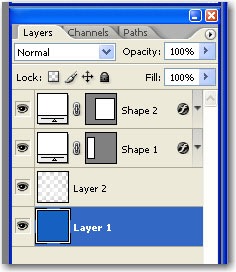
This will make a selection
Grab the rectangular marquee tool
Press on Subtract From Selection and try to leave selected the top of our navigation panel
This is what we need
Create a new layer ( press CTRL+ALT+SHIFT+N )
Select Paint Bucket Tool and fill the selection with white
Press CTRL+D to deselect

Now change the fill settings to 0 %
And add the following layer styles
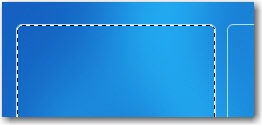
Now press one more time on the same layer thumbnail
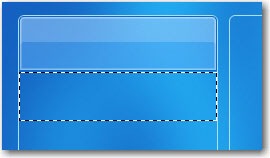
We have to select one more time all the navigation panel ( you can see also how the button looks )
Grab the Rectangular Marquee Tool - press on Subtract from selection and be sure you will leave selected a small selection ( for the second button )
Create a new layer ( press CTRL+ALT+SHIFT+N )
Fill the selection with white and apply the same layer style as above
( i am sure you can do this alone because we have already created the first button and i think you are an expert right now )
Now duplicate this layer and place it with your arrow keys under this one.
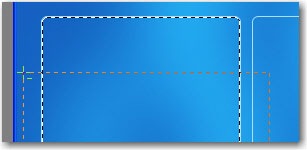
Select one more time the navigation panel ( press on layer thumbnail and keep your CTRL key pressed )
Create a new layer ( press CTRL+SHIFT+ALT+N )
Grab a round brush and start drawing some random lines
Go to Filter > Blur > Gaussian Blur and set the radius value to 35
Change the blending mode to Soft Light 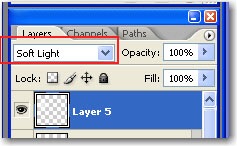
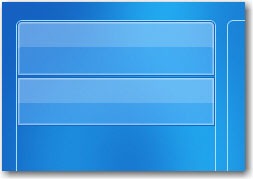
Press on CTRL+D to deselect. I will add some text on this navigation and this is my result

Now please select the left navigation layer ( the layer you have clicked on thumbnail )
And change the following layer style with this one 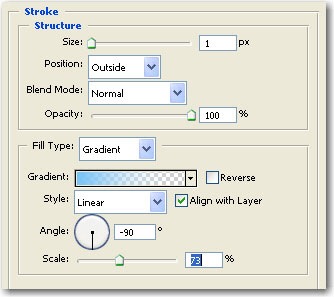
This is the result 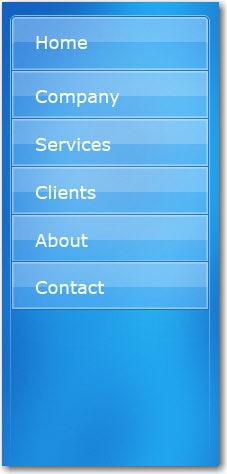
Copy the layer style 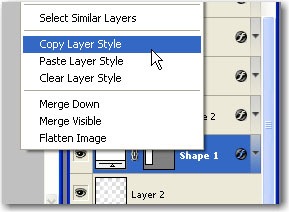
And paste this layer style on the other shape 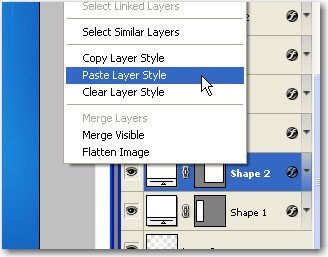
This is the result 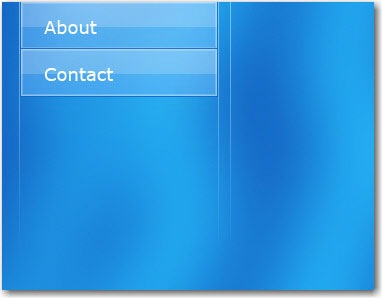
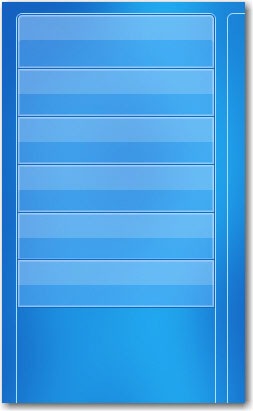
Duplicate the big shape layer ( SHAPE 2 ) then select it
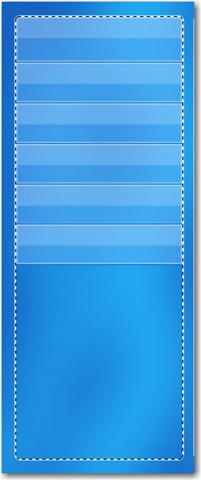
Then press on add layer style 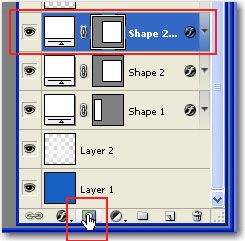
Grab the Gradient Tool and draw a line from bottom to the top of the shape 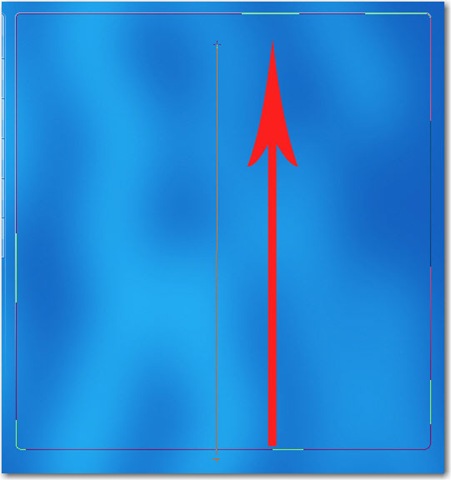
With this layer selected you can change the fill settings to 3 %
Now i will add a text logo
Then i will add some MINUS signs on the big rounded rectangle and another text
Then i will choose " Fuzzball " brush . i will create a new layer and i will make some white stars
Basically you can use any star brush you have 

